Sending your Print-ready Files
Getting your artwork right before sending it to print saves time, money, and stress. At Whitstable Print, we want your finished product to look exactly as you imagined – crisp, clean, and professional. This guide walks you through everything you need to know to prepare print-ready artwork correctly – from setting up bleed and colour modes to choosing the right paper size and fold. Whether you’re printing business cards, brochures, or posters, following these steps ensures the best possible results.
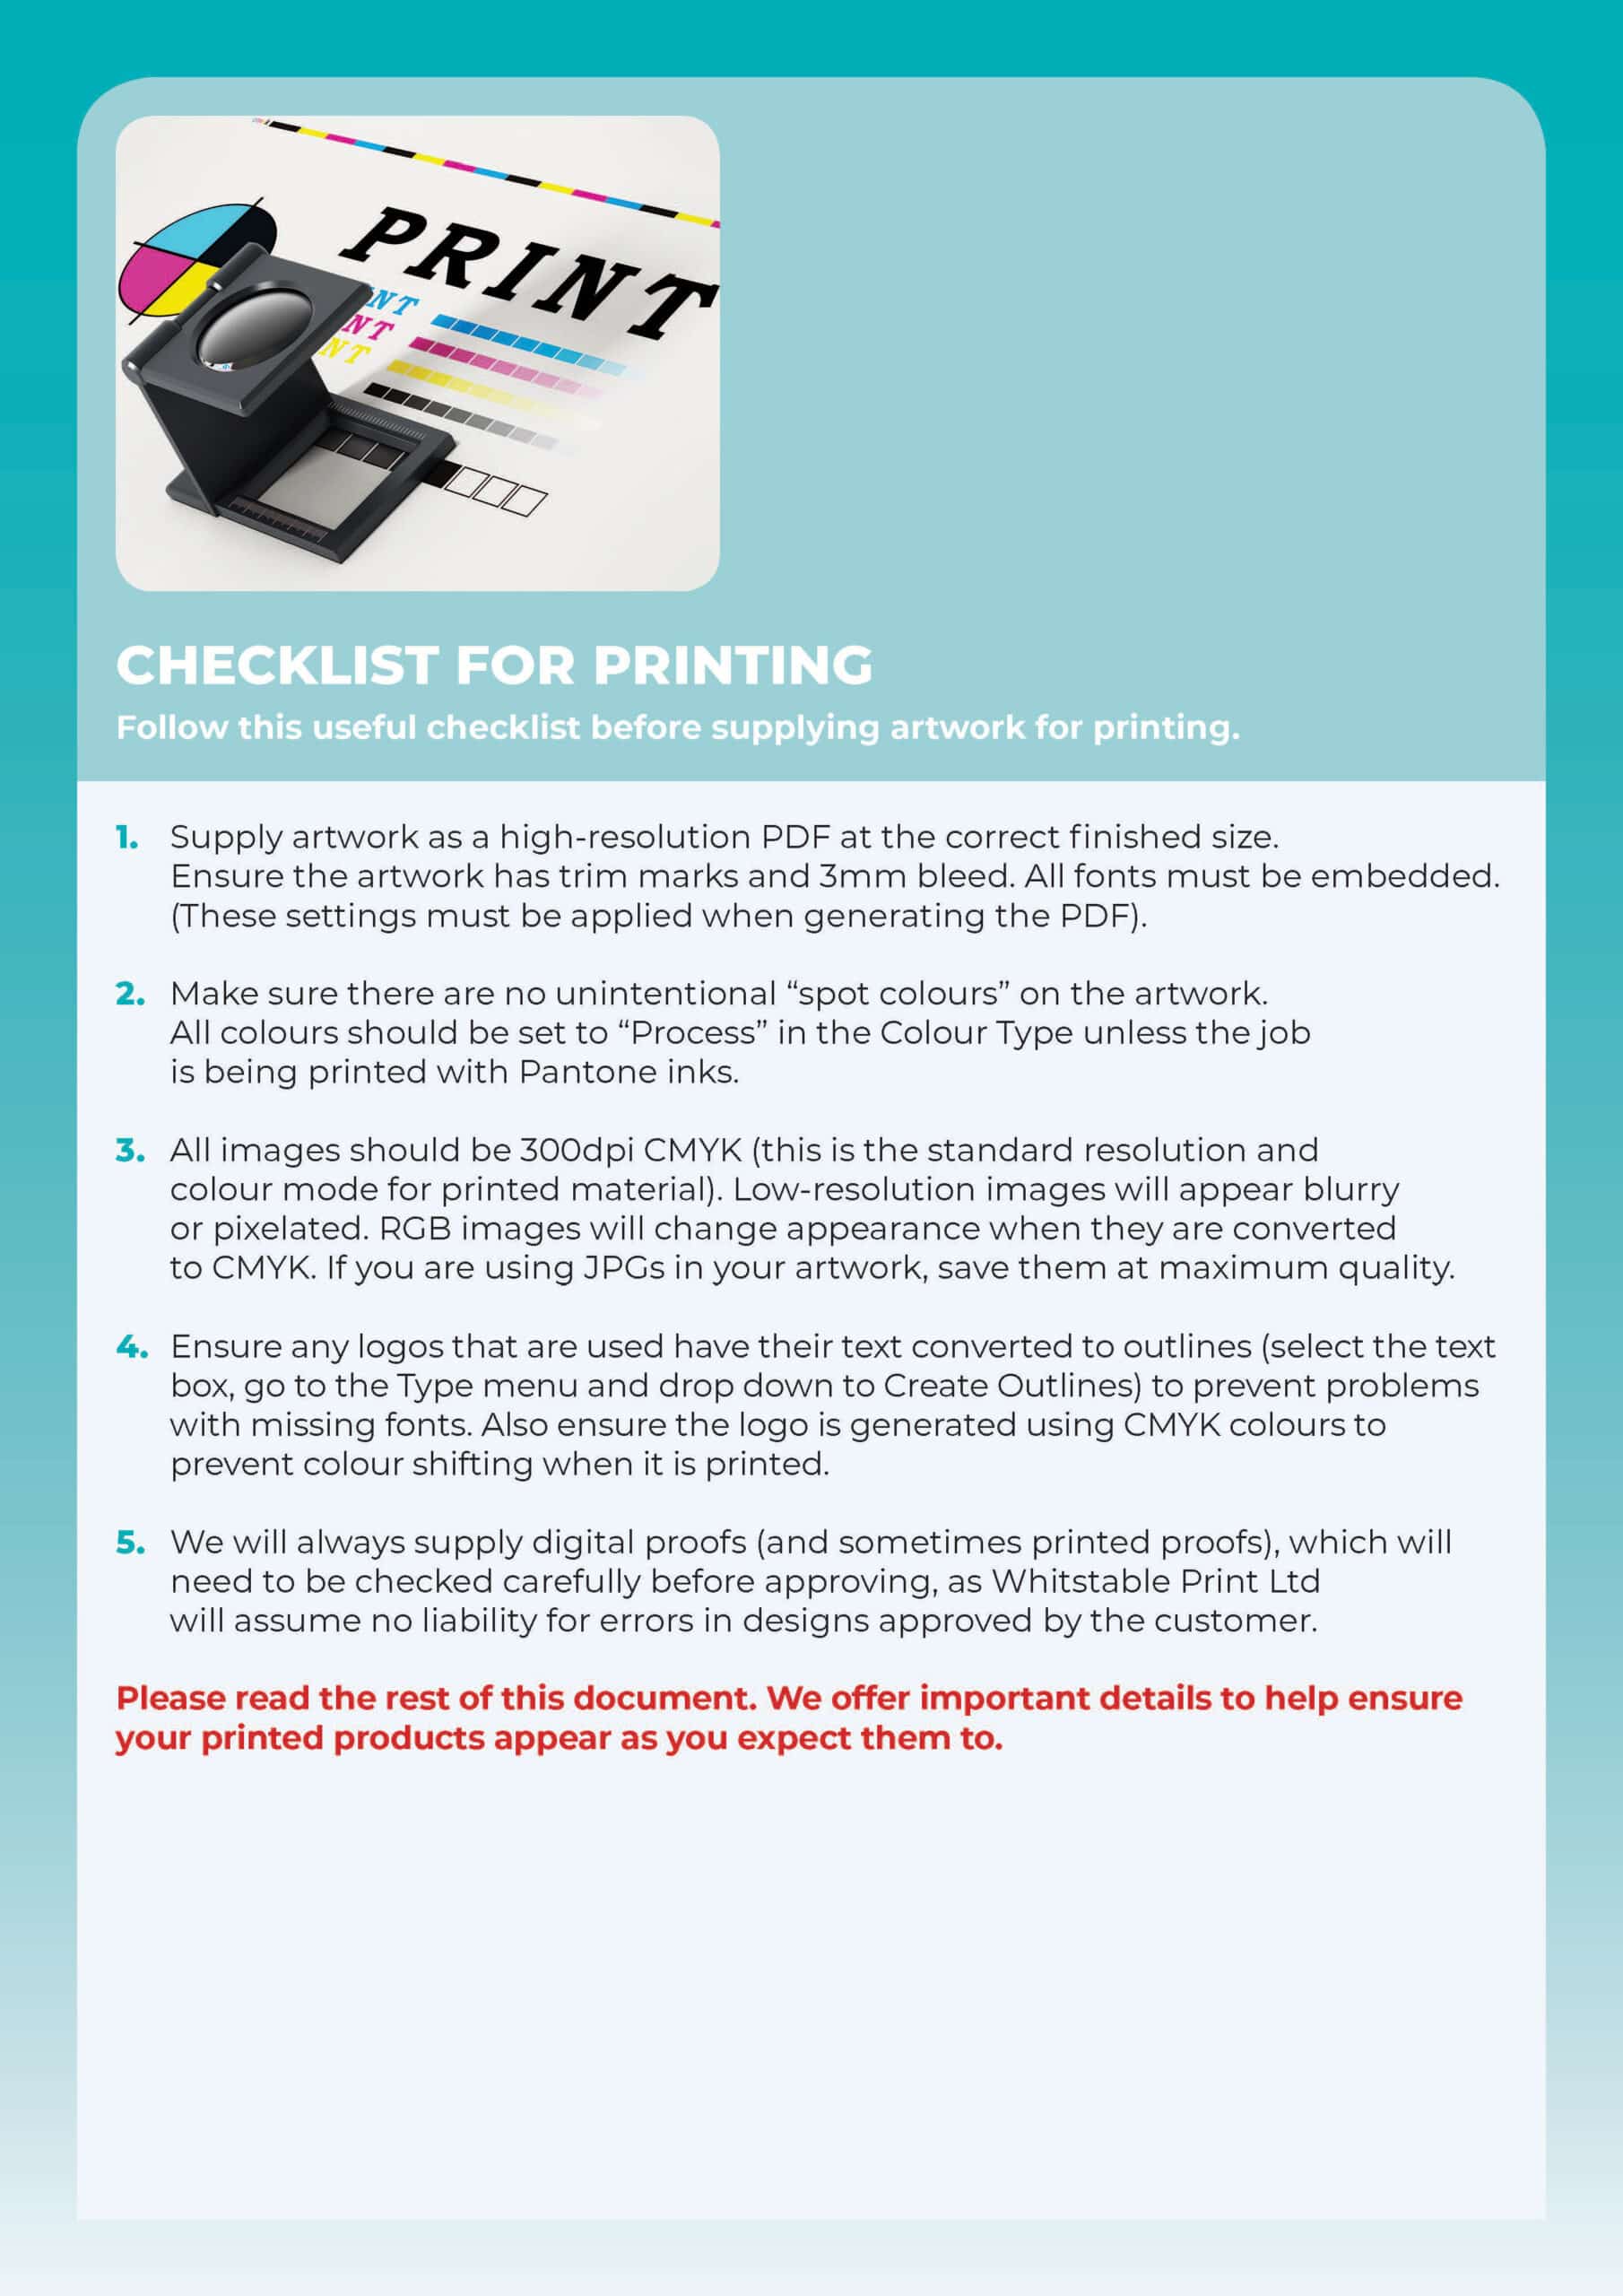
Print-Ready Checklist
Before uploading your artwork, make sure it’s truly print-ready. Check the file format (PDF is best), set the correct size, use high-resolution images (300dpi), and include bleed where required. Double-check spelling, alignment, and margins to avoid costly reprints.
Click image below for more information.
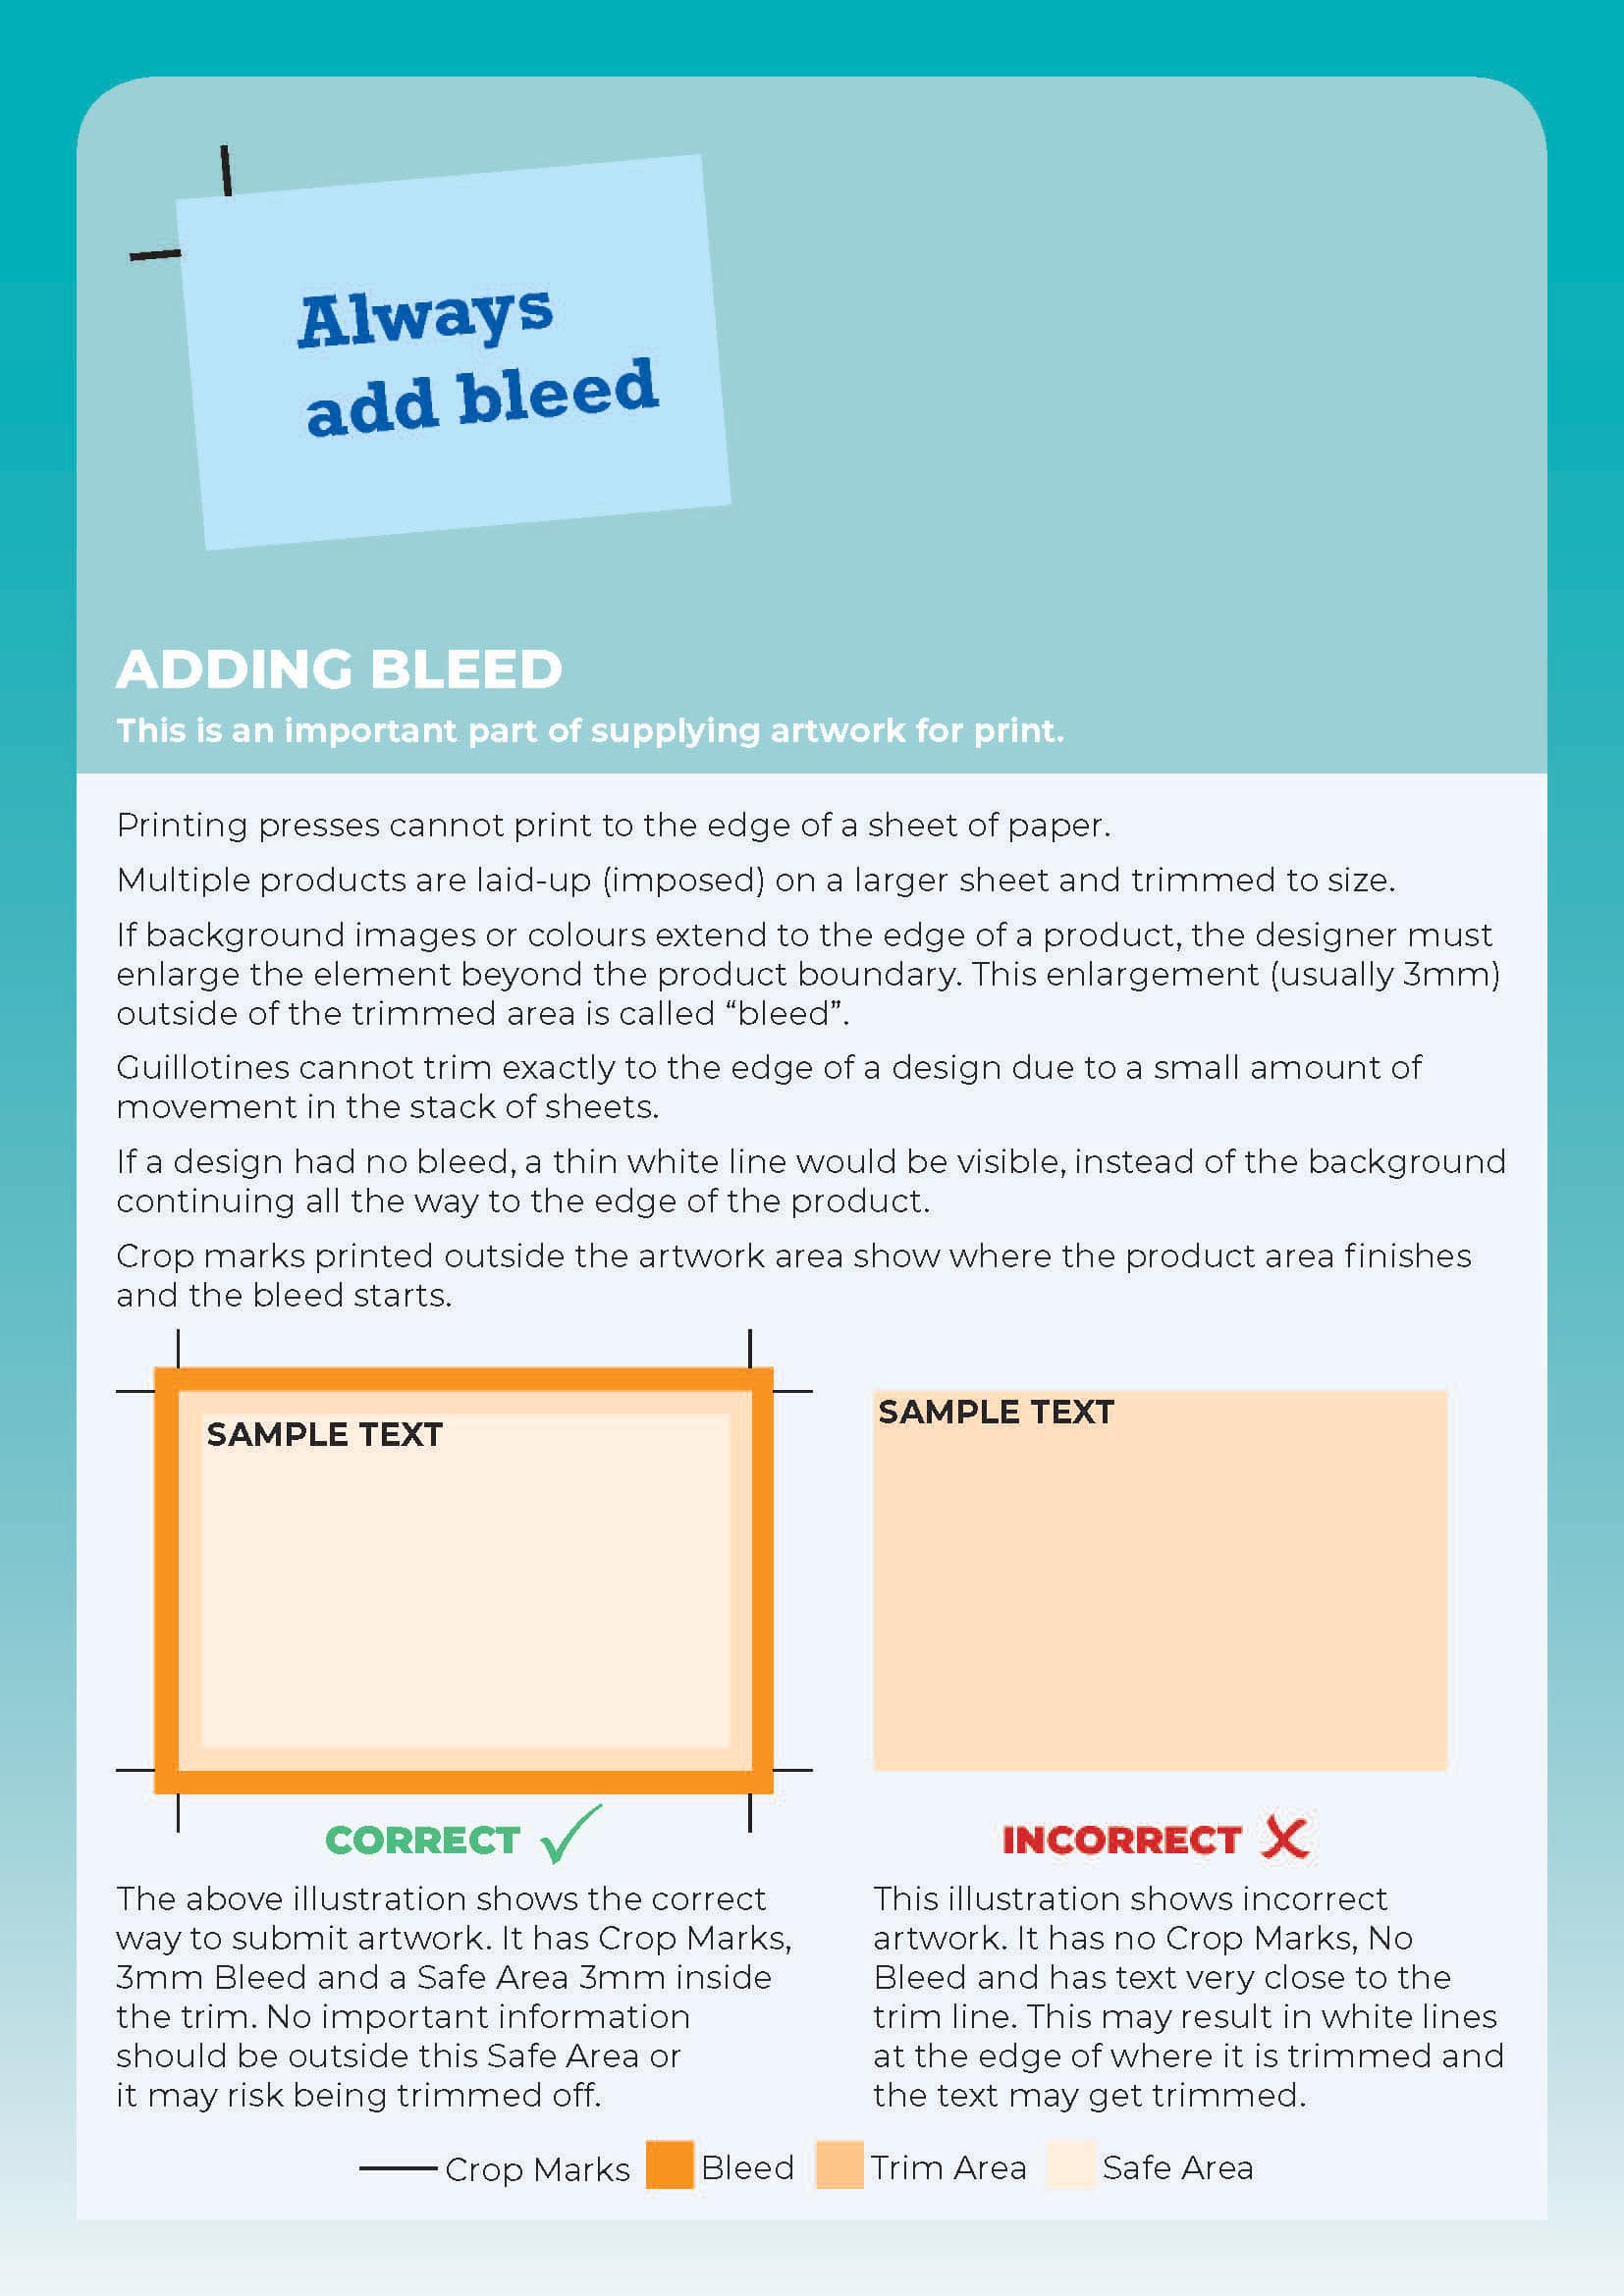
Adding Bleed Correctly
Bleed ensures your design prints edge-to-edge without leaving white borders. Always add at least 3mm of bleed on all sides of your artwork. Keep important text and logos within a ‘safe zone’ at least 5mm from the trim edge to prevent accidental cropping.
Click image below for more information.
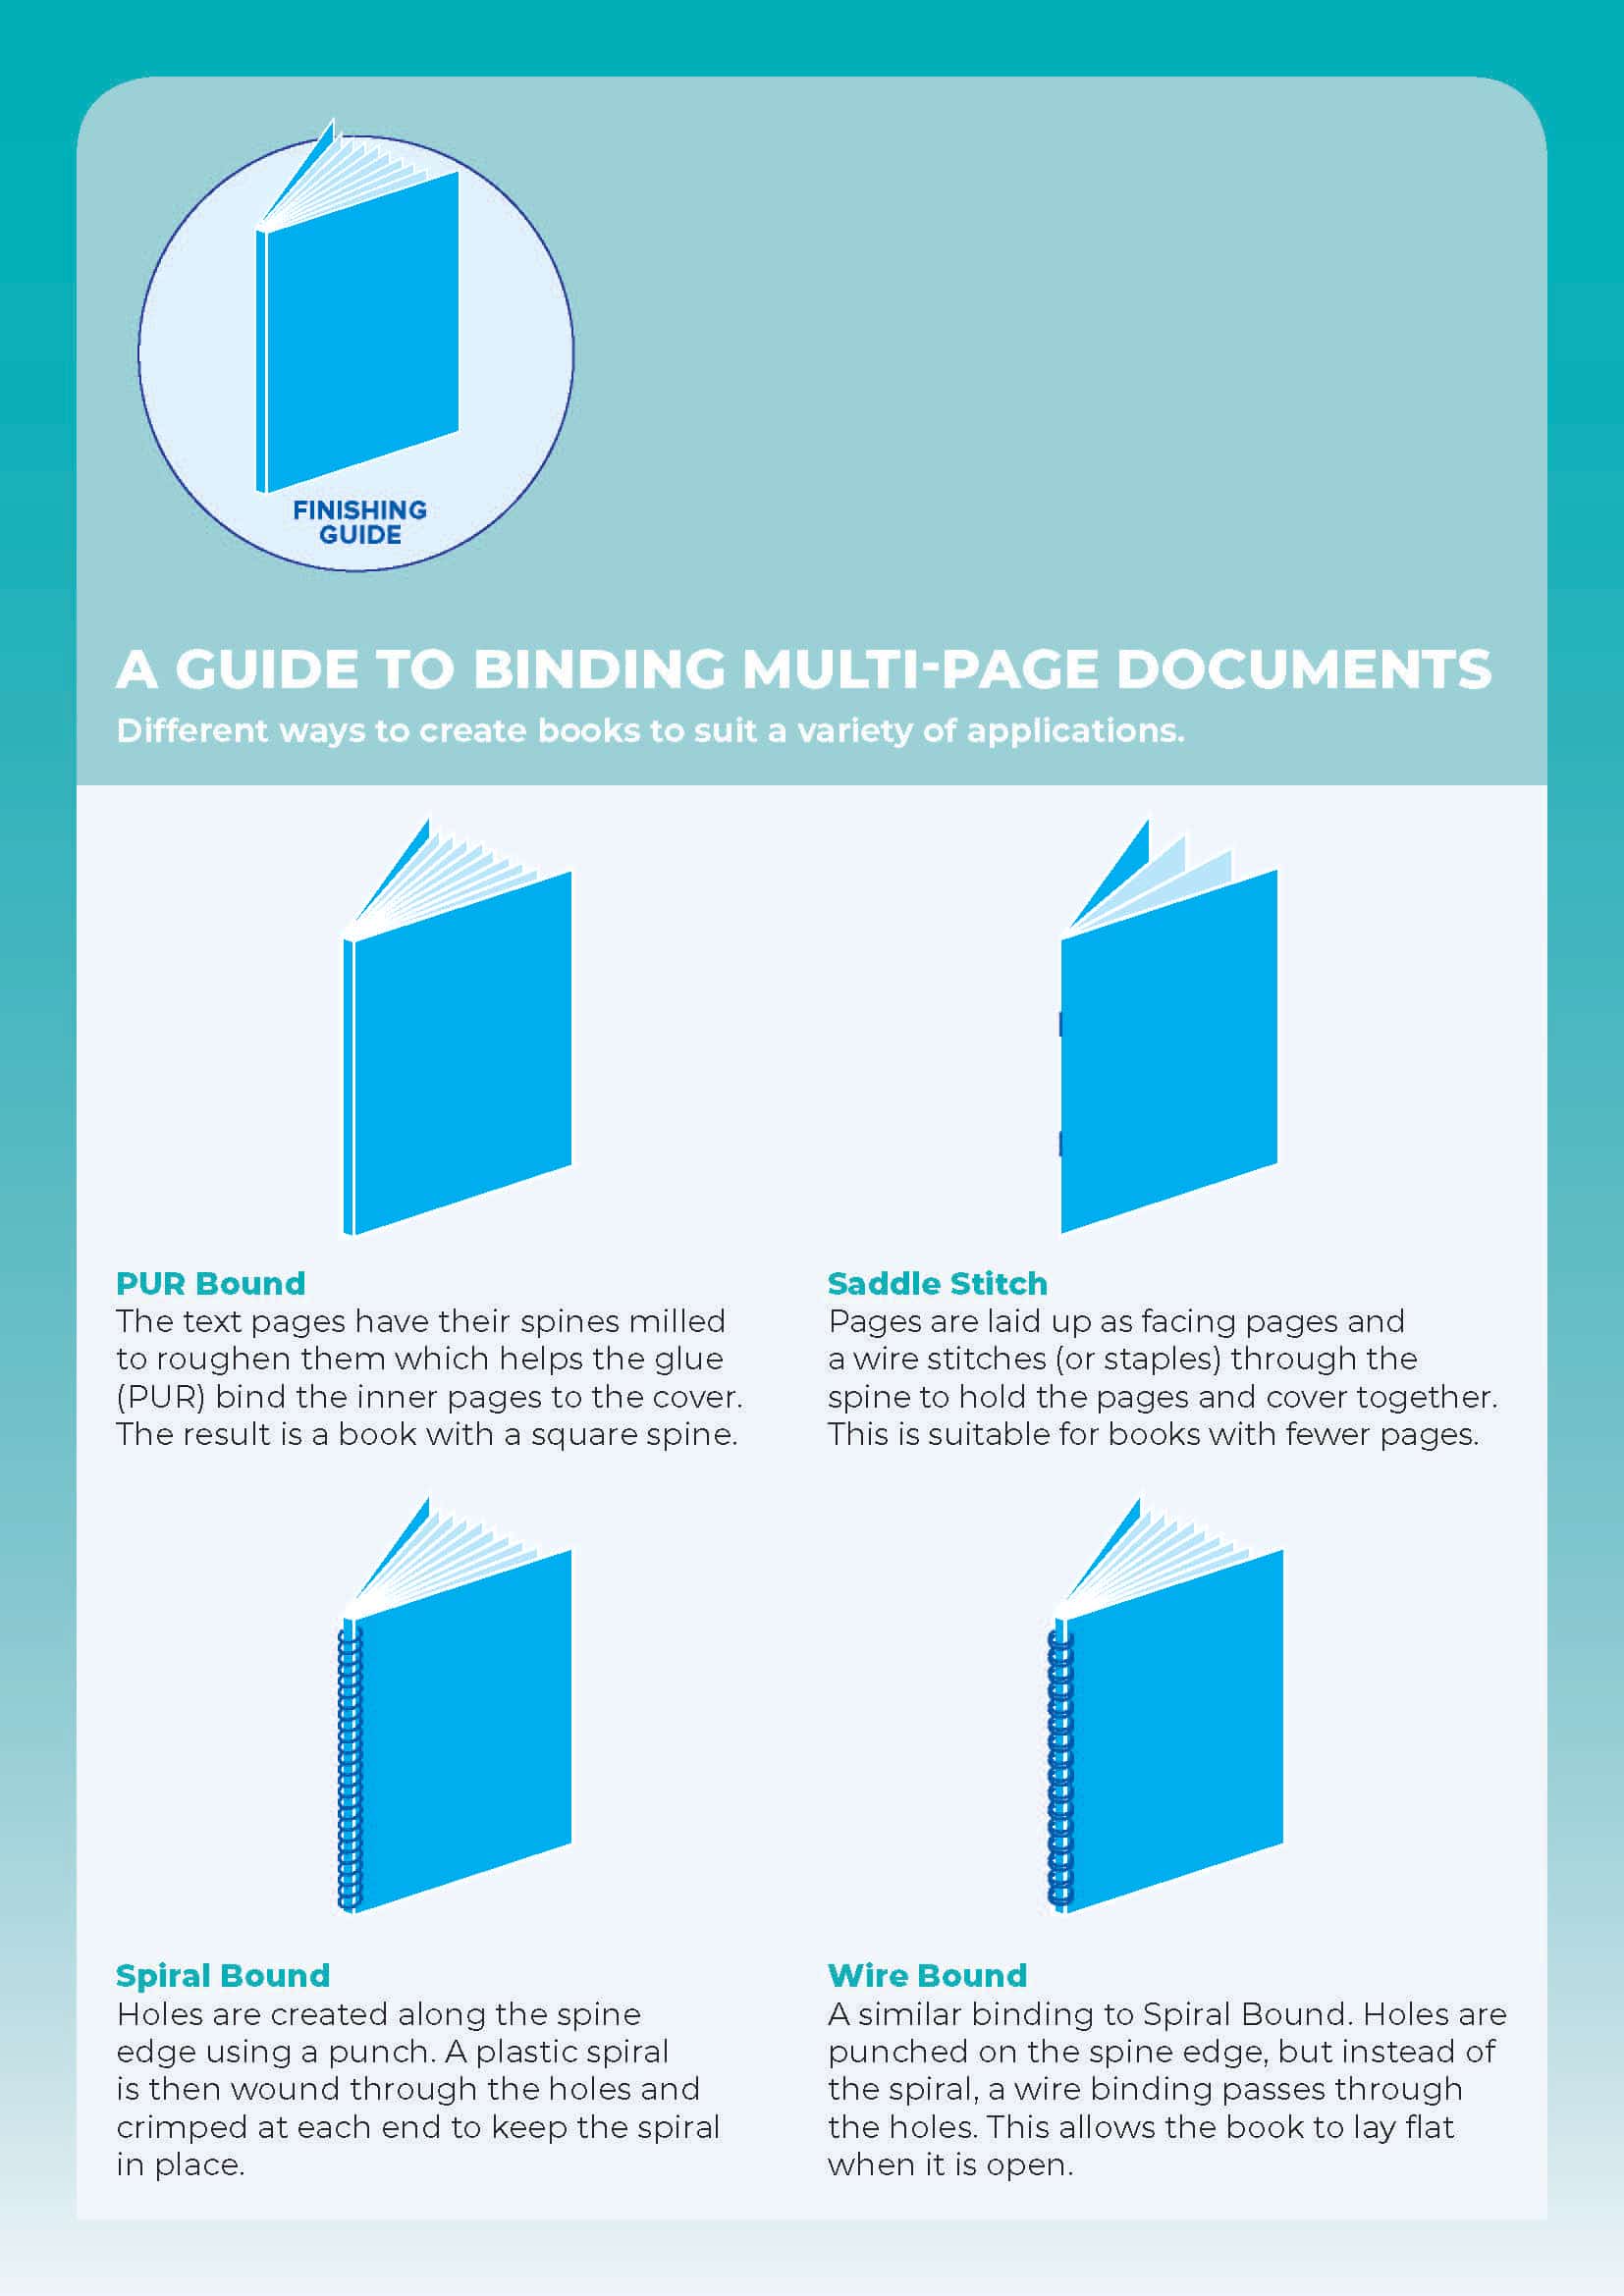
Preparing for Binding
If your job is being stapled, perfect bound, or wiro-bound, allow for binding space. Avoid placing text or key images too close to the spine or binding edge. For booklets, consider page order and how spreads will line up once assembled.
Click image below for more information.
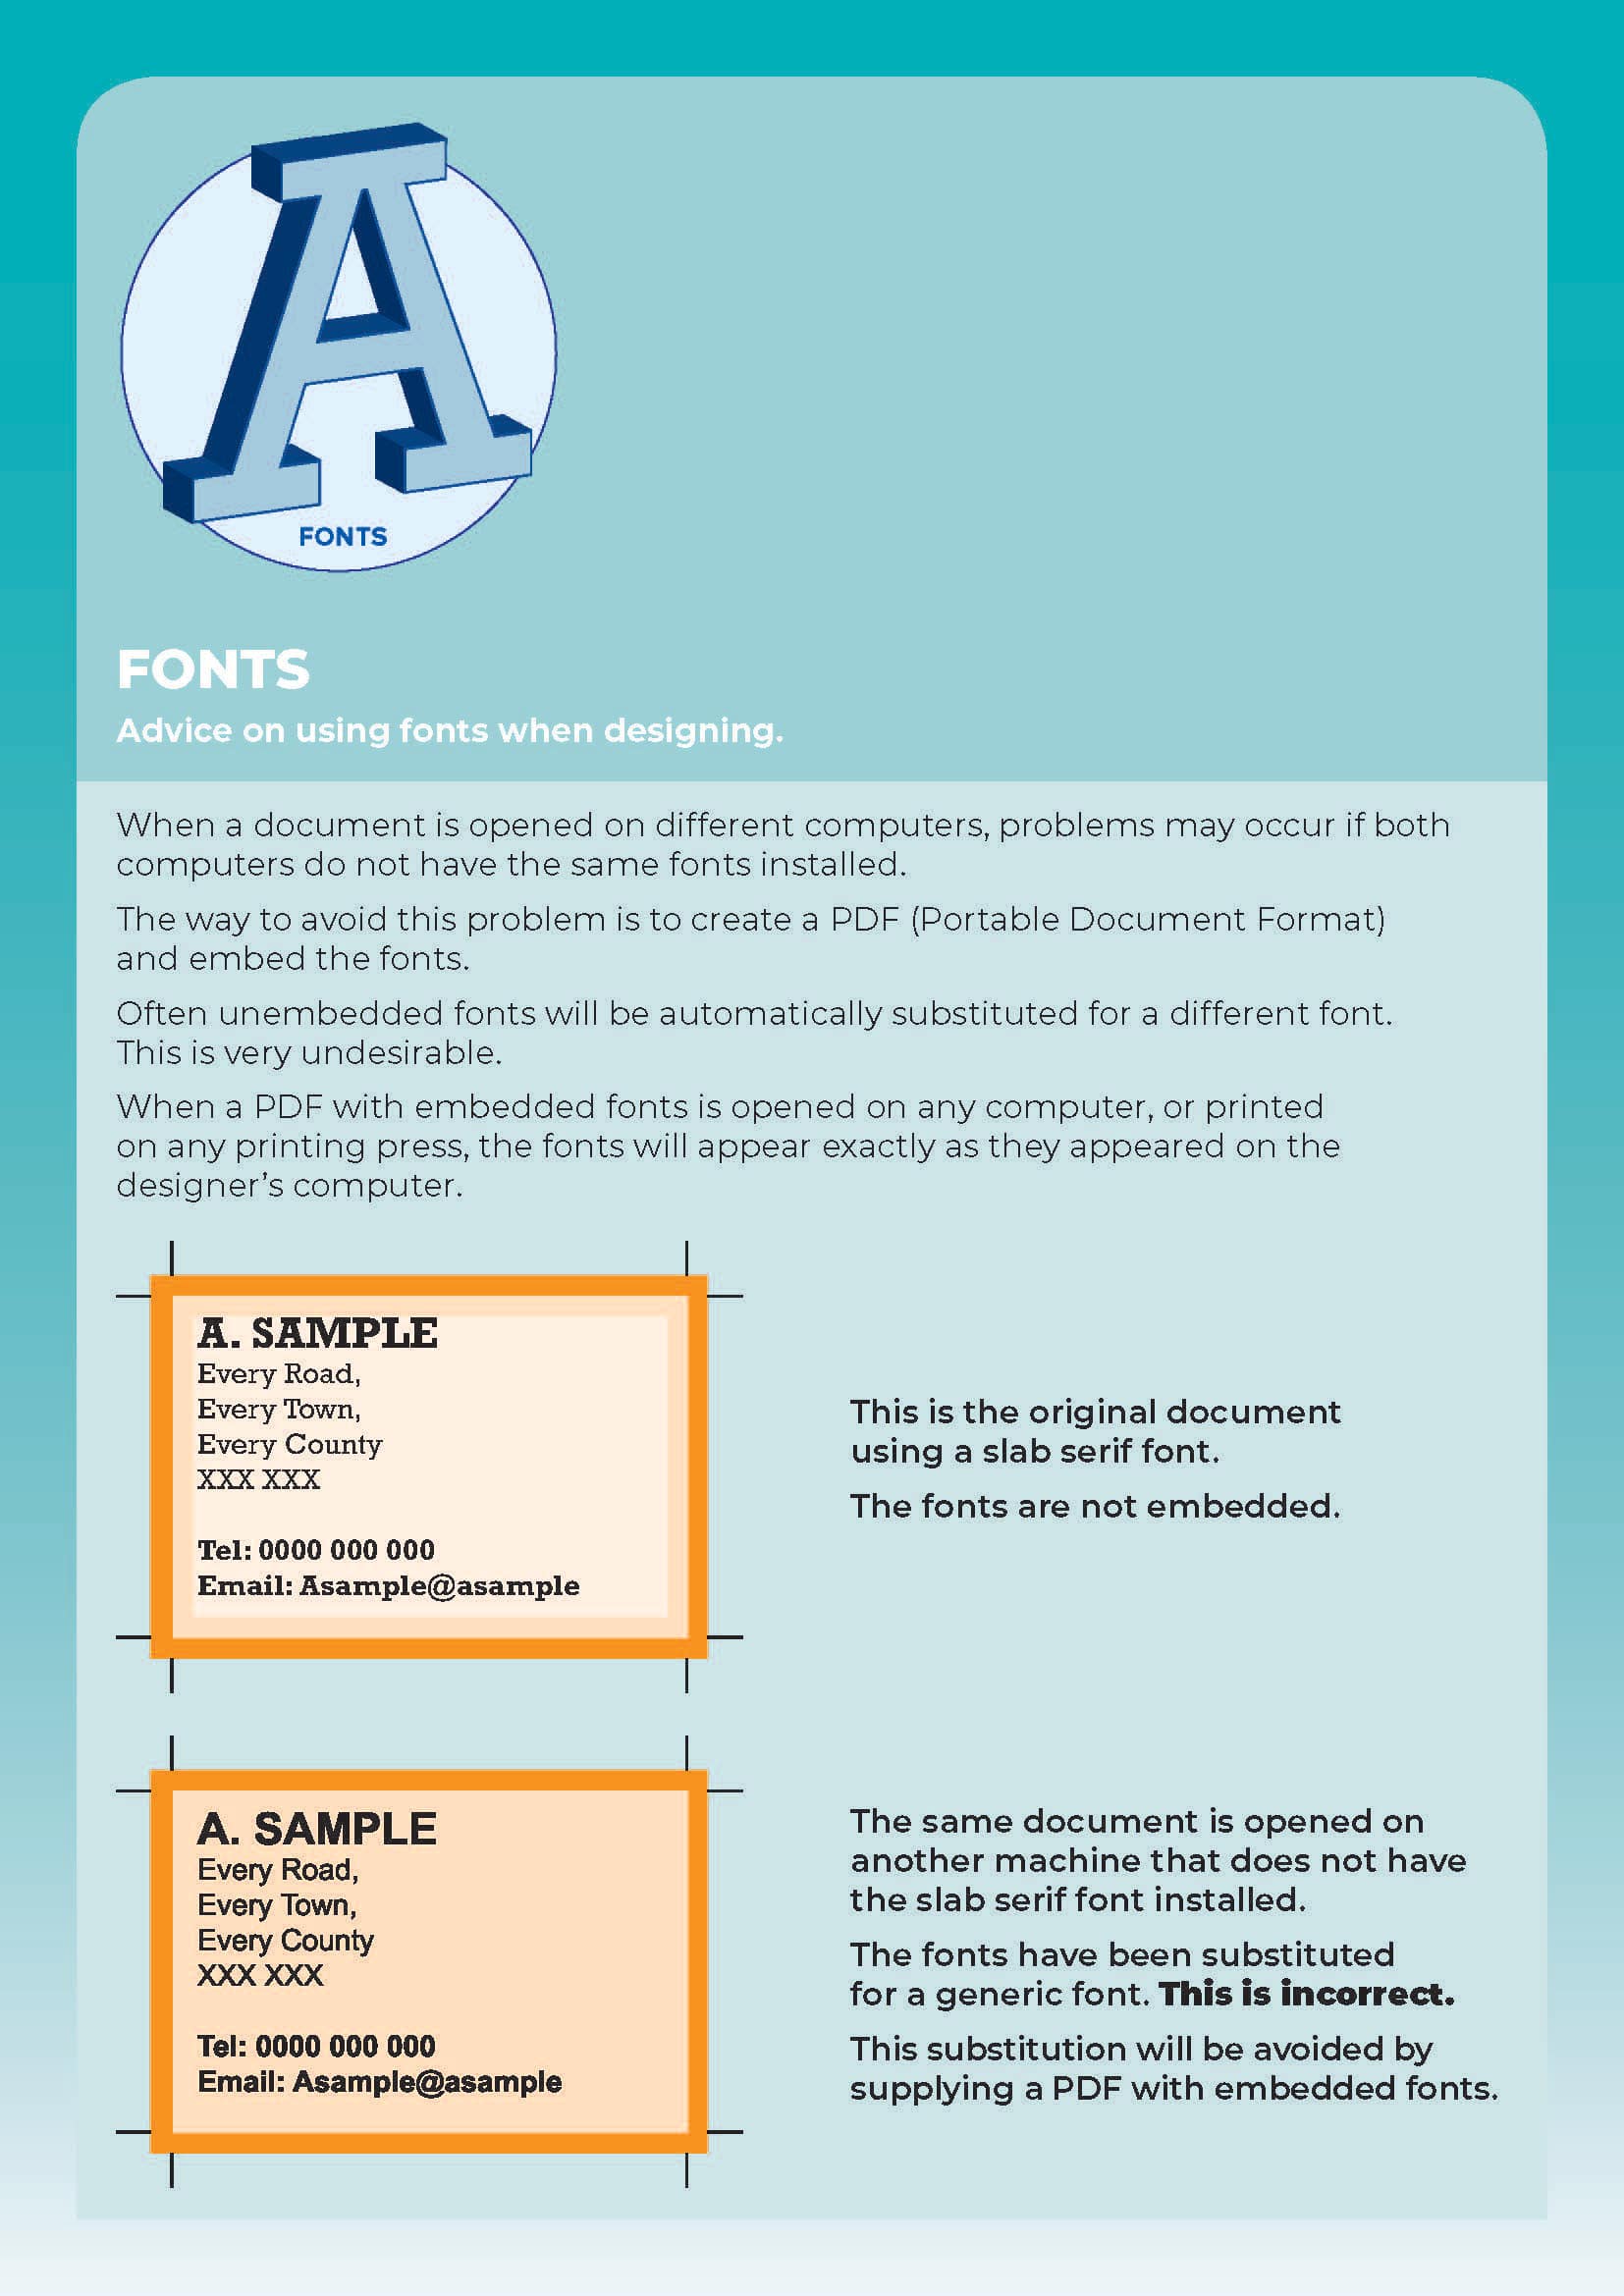
Fonts & Text Guidelines
Embed or outline your fonts before exporting to avoid font substitution. Keep text at least 6pt for legibility, and avoid thin or overly decorative fonts for small print. Check kerning and spacing carefully to maintain a clean, professional look.
Click image below for more information.
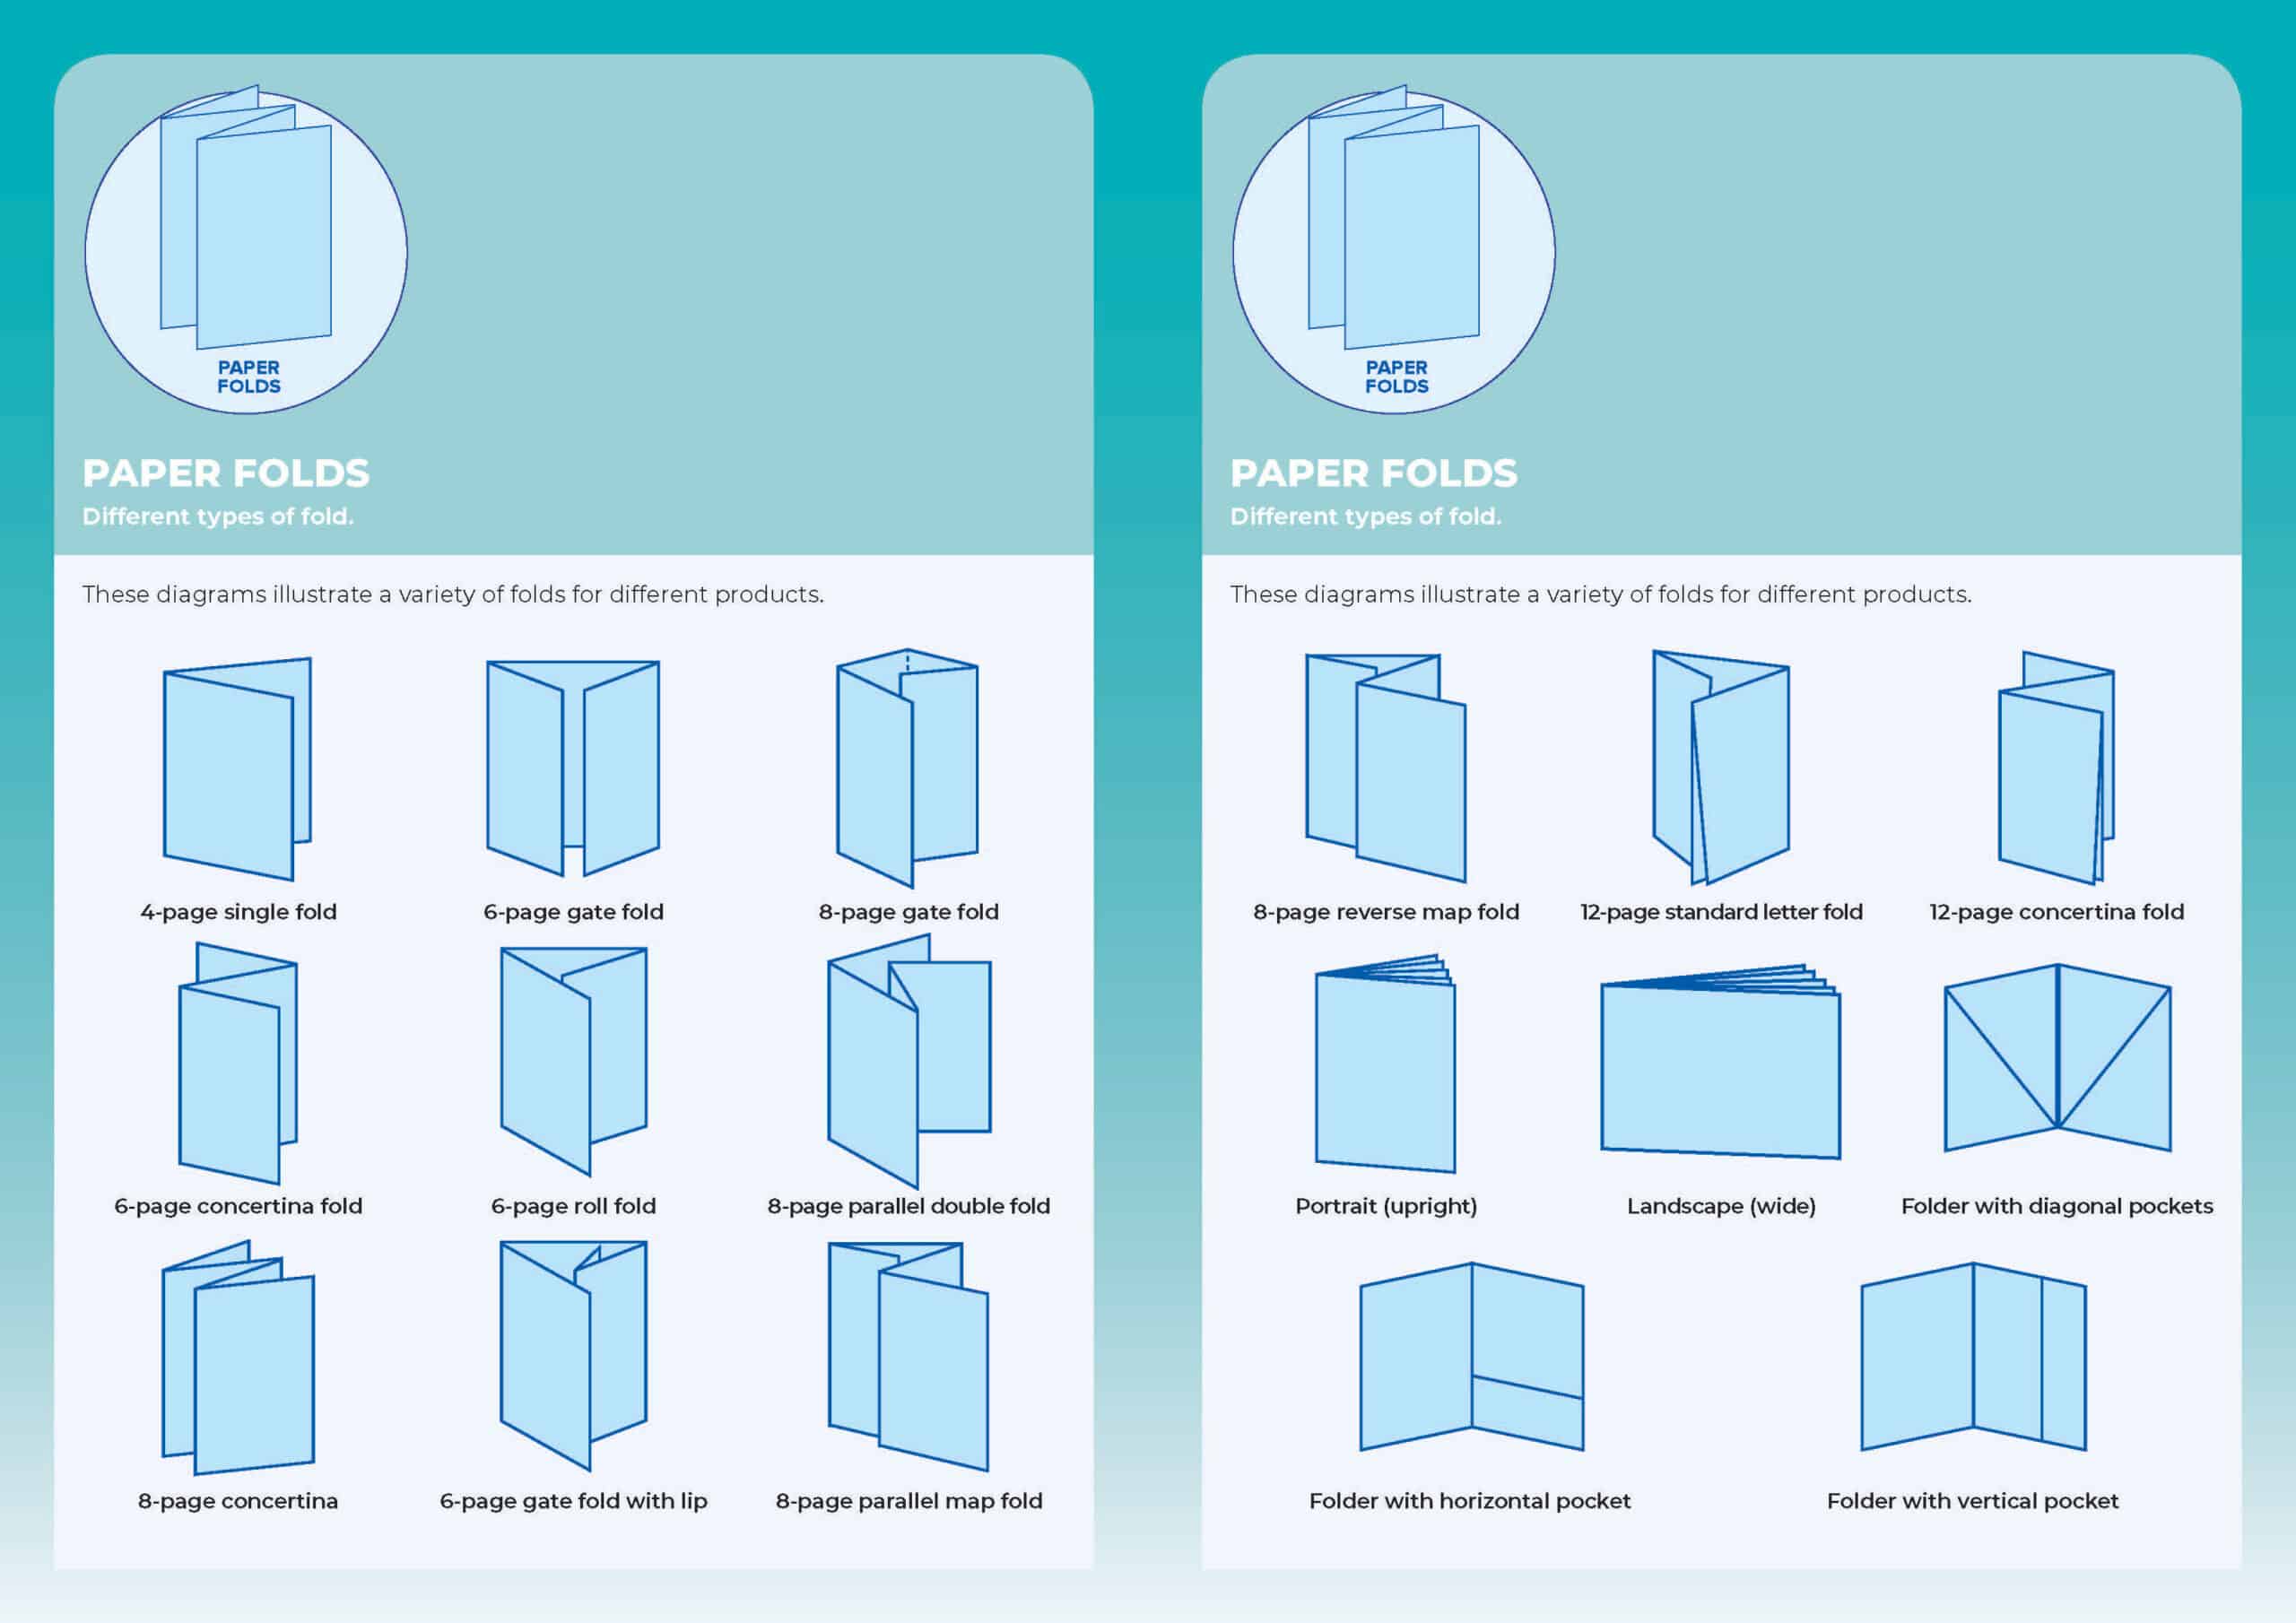
Paper Folds
When designing folded leaflets, think about how the panels will fold. A tri-fold (roll fold) needs slightly adjusted panel widths, while Z-folds work with equal panels. Always set up your artwork as separate panels to avoid misalignment when folded.
Click image below for more information.
Colour Setup
Print uses CMYK (Cyan, Magenta, Yellow, Black), while screens use RGB. Always convert your artwork to CMYK before sending it to us to ensure accurate colour reproduction. Spot colours or Pantone references can be used for specific brand consistency, but they will be converted into CMYK for print.

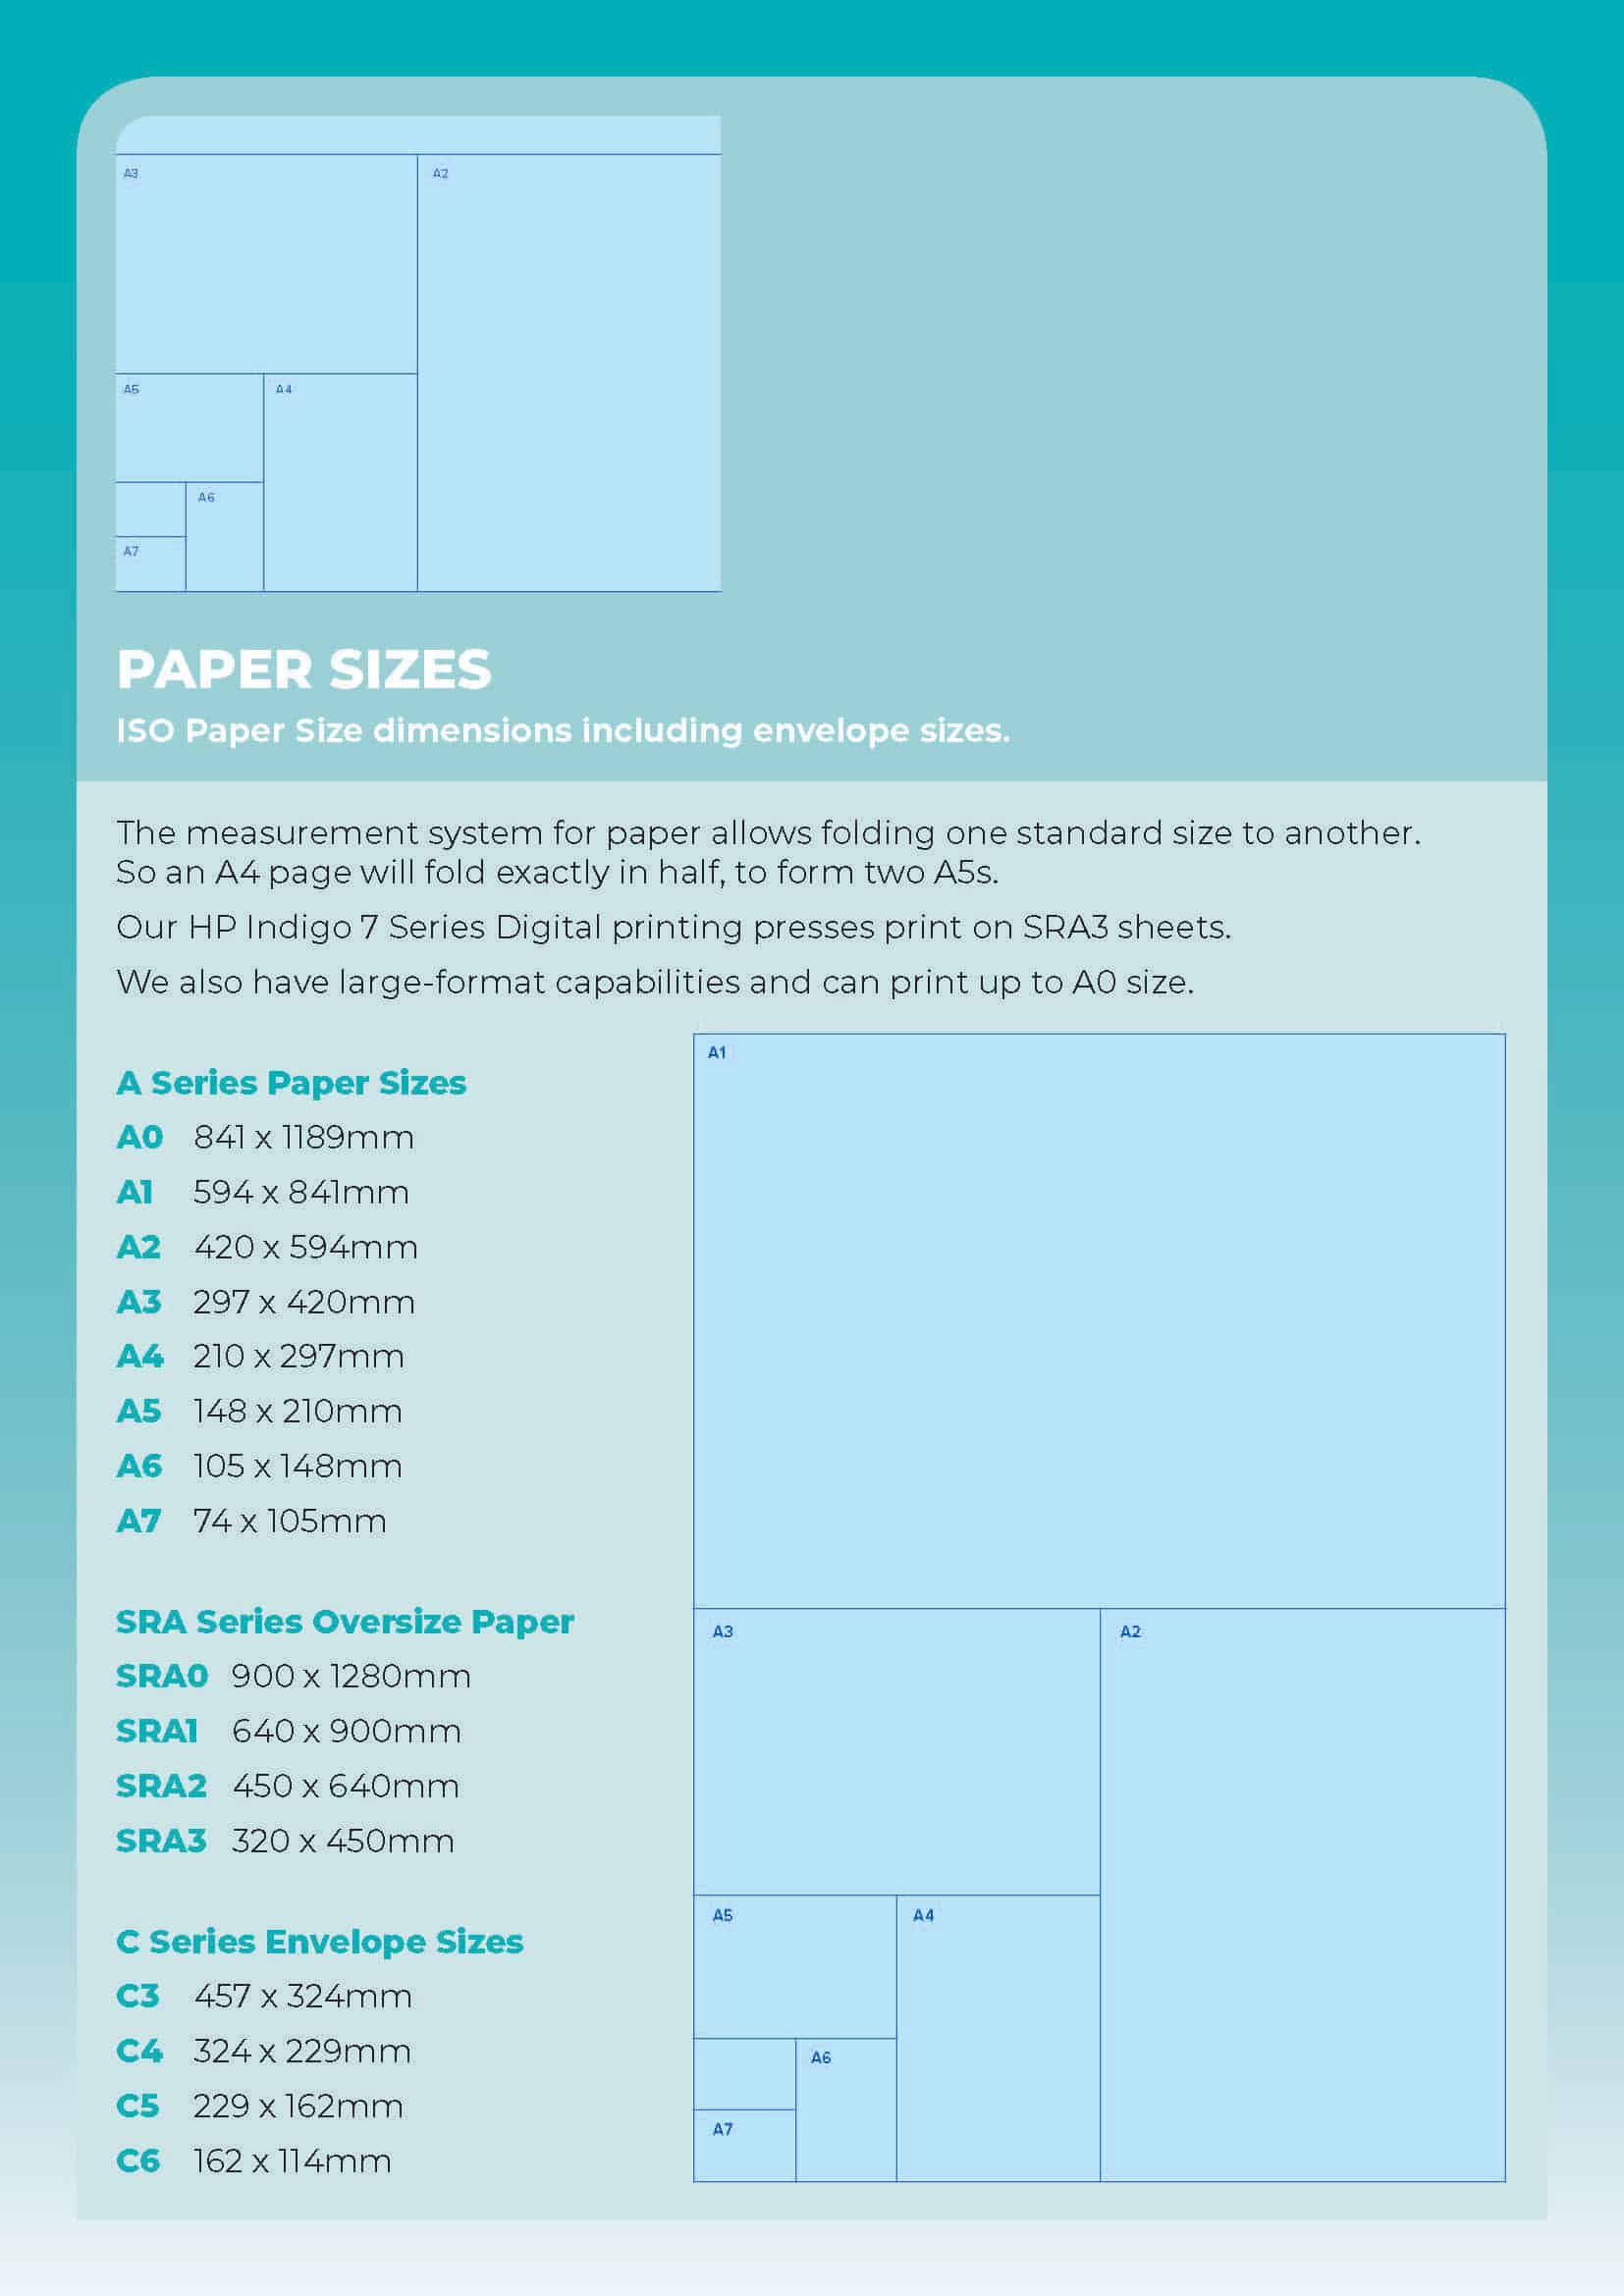
Paper Sizes
The most common sizes include A4 (210x297mm), A5 (148x210mm), and DL (99x210mm). Make sure your design fits the chosen size and allow for bleed and safe zones. If unsure, ask for a template before starting your artwork.
Click image below for more information.